From babies to toddlers, teenagers to adults, if there’s one type of game we all enjoy, it’s a good puzzle!
Puzzles not only draw us in with an exciting challenge, but completing them is instantly rewarding. They even help hone spatial awareness, concentration, and a whole host of other skills.
So for this week’s Co-Create with shumee, let’s make an awesome puzzle, only using materials you already have at home!
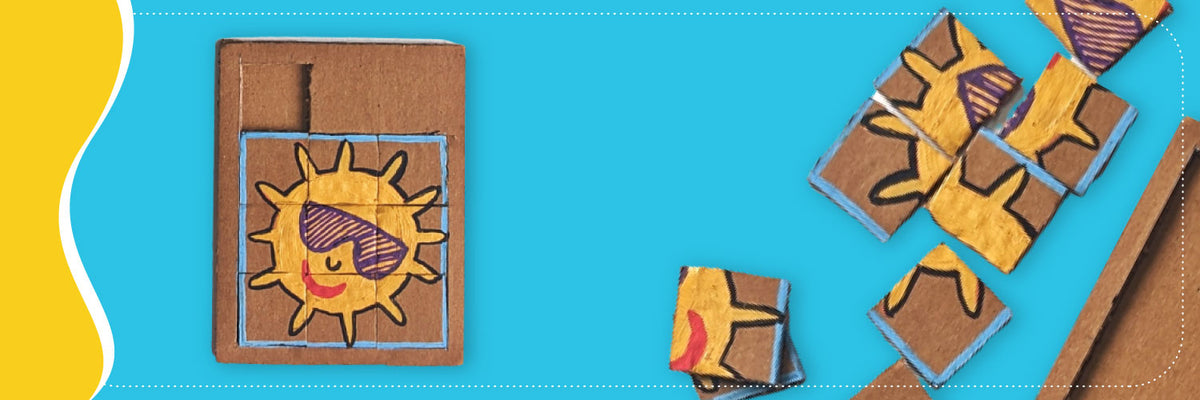
Sunshine Sliding Puzzle
This week’s Co-Create game is brought to you by Mansi, a DIY blogger and a preschooler mom. Today, we will be making a Sunshine Sliding Puzzle!
This sliding puzzle is packed with 90s nostalgia, is fun to make, and will help your child sharpen a number of their developing skills! The benefits of playing this include:
1. Develops logical thinking: Figuring out how to sort the puzzle will hone your child’s reasoning and problem solving skills.
2. Hones visual discrimination: Identifying what each piece of the puzzle is will sharpen their visual discrimination skills.
Did you know that babies only see in monochrome? Read more about how children’s visual skills develop and what activities help them along this journey. |
3. Strengthens spatial awareness: Working with small pieces of the puzzle and finding their right spot on the grid will strengthen their spatial awareness.
4. Builds fine motor skills: Puzzles are an excellent way to help hone your child’s fine motor skills such as hand-eye coordination, midline crossing, and finger strength.
5. Sharpens focus and concentration: Playing to complete a puzzle is fun, ensuring that your child stays focused for long stretches of time.
Creating the Sliding Puzzle

Age recommendation:
This activity is best suited for children between 4 to 6 years.
Materials required:
1. Cardboard sheets
2. Acrylic markers and paints
3. Precision cutter
4. Glue
How to create the activity:
1. Cut two cardboard pieces out in a rectangular shape.
2. Divide one of the cardboard pieces into 12 grids, with 3 columns and 4 rows. Leaving the first row, draw and paint a sun (or any image of your choice!), making sure you get a bit of the picture in each grid. Refer to this video for specifications.
3. Draw a border around the sun and cut out the 9 square grids, along with one from the top left corner, as shown in the image above.
4. Remove the cut out squares and stick the cardboard pieces together, one forming a base and the other being a frame.
5. Once you’ve stuck the pieces together, place the squares back into the frame. Your puzzle is ready!
Playing with the Sliding Puzzle

The aim of the game is to slide the 9 pieces into the right positions to create the sun.
Start off by sliding the pieces around to jumble them up. Then show your child how they can move each piece to fix and complete the puzzle. Once they’ve seen you do it, hand the puzzle over and let them give it a try! You can even time them and ask them to beat their high scores.
We hope you’ve enjoyed this activity. If you would like to share your experience creating and playing with this puzzle, tag us at #CoCreatewithshumee.
Mansi is a DIY blogger and mom who shares play based activities and easy cardboard DIYs for children. You can follow her @kalaakarimom on Instagram.
